Sunday, August 28, 2011

CrAzY cUtE fAsHiOn-Take 1

I have so much fun buying & picking out clothes for my daughter. Putting her outfits together makes me happy :) I thought I would share some of her "Crazy Cute Fashion" with you all. I hope you enjoy!!


Here's a breakdown of what she wore:

Black & Gray dress by Disorderly Kids
Sandals by SM New York
White & silver heart earrings from Claire's
Black, white & silver guitar pick bracelet from Claire's

Linking up:

Saturday, August 27, 2011

Headboard Garden Bench

We have been wanting to put a fence up across our backyard for a couple years now & we are finally getting around to getting it done. I am so excited about this project (mostly because I have another "wall" to decorate now) YAY :)  I found an old headboard & footboard at the dump & thought it would make the perfect garden bench. I did have to have my husband's help on this since I am afraid of table saws ;)

I got a bit eager & cut the footboard in half before I took the photo.
My husband built a frame for the seat area & we just screwed 1 x4s to it. Attached the footboard to the sides with screws & painted with leftover paint I had in my basement.
I think it turned out so cute. It adds a nice pop of color to my backyard :)

Thursday, August 25, 2011

Button Art

Hello there ;) I have been busy working on "mini" projects this week & having a great time!! My sister found a can of vintage buttons for only $1 at a garage sale & bought them for me. I literally spent an hour looking through them, I was smitten ♥♥ I couldn't wait to get busy on a project using my "new" buttons. Here is what I came up with...


Monogram Button Art
Displayed in my kitchen
It makes me smile everytime I walk in the kitchen :)

This project was super easy. A spray painted fram w/ burlap attached to the back, hot glue & buttons.

Monday, August 22, 2011

I'm IN LOVE with these!!

I made a trip to the "free barn" at our local dump this weekend. It was my lucky day. Look at what I found!!

A whole box full of Kerr Mason Jars!! (I had already ripped some out of the box & cleaned them up when this photo was taken)
Wasn't so fond of these guys, but at least they were dead ;)

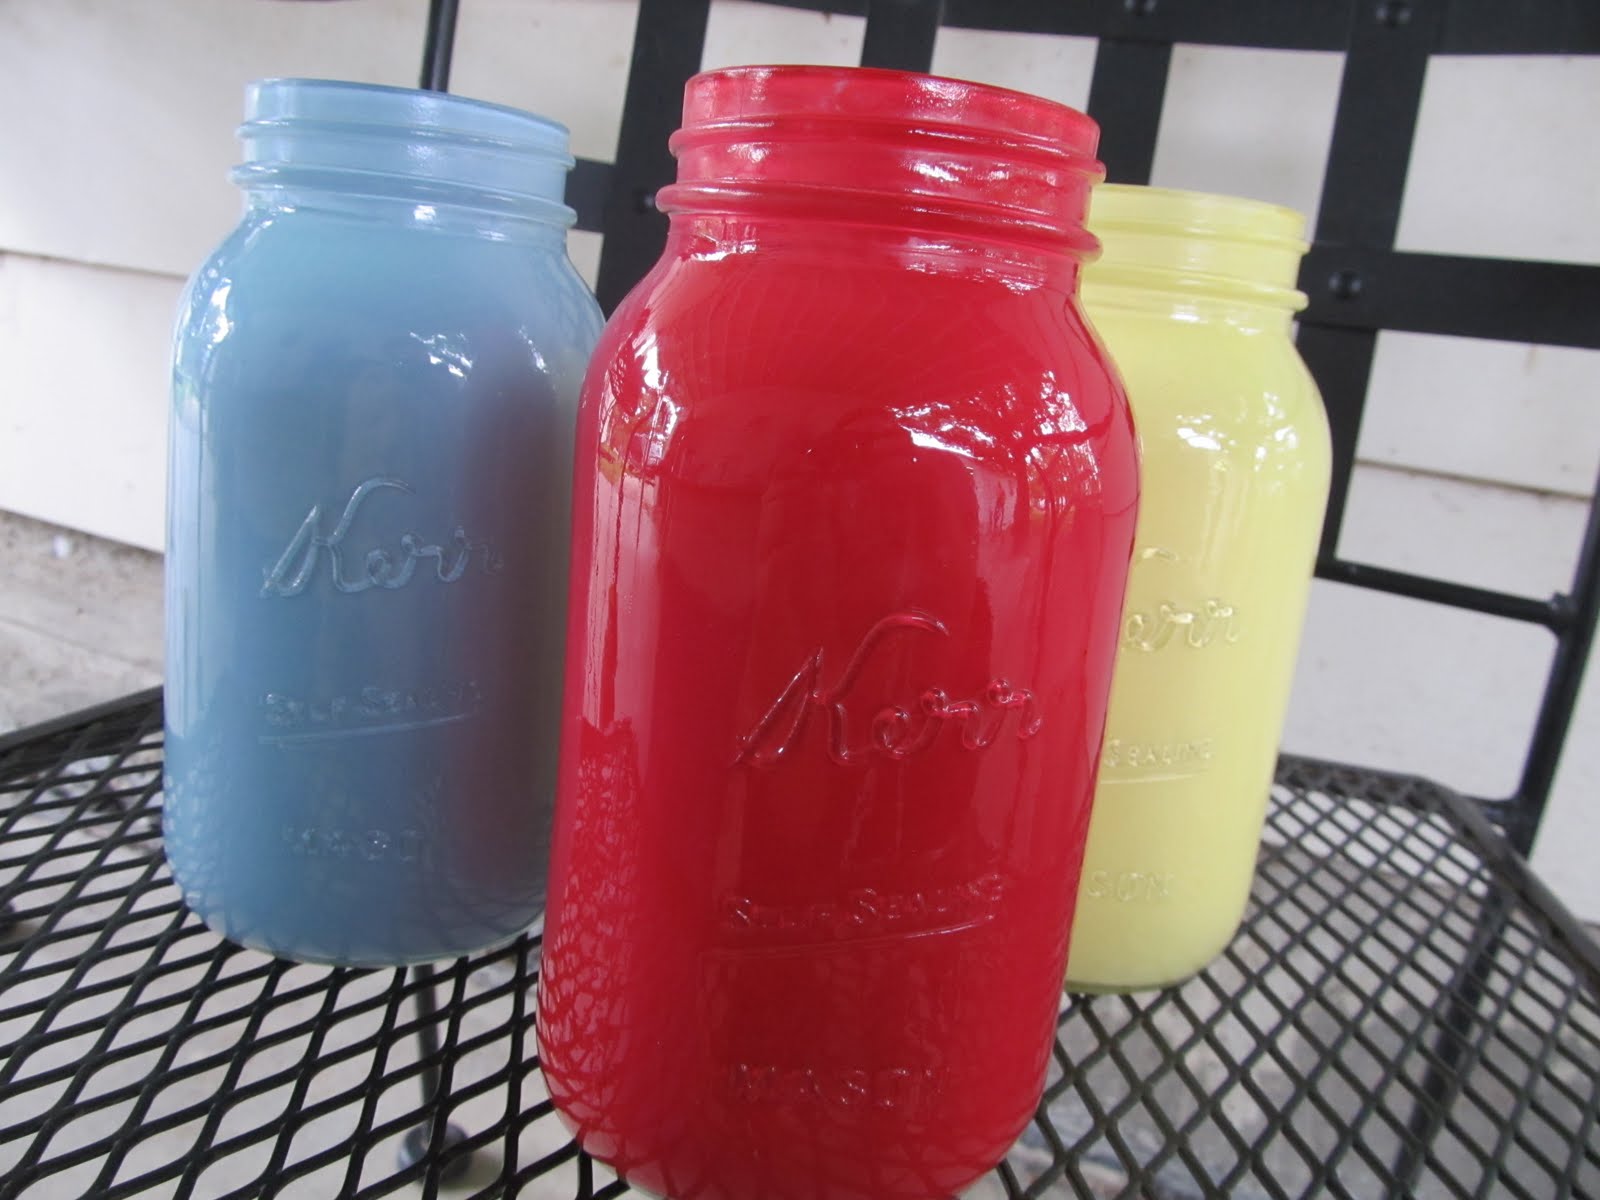
I decided with this many jars at my disposal I would get a little crazy & try to paint a few. I scoured my basement looking for any color that might look good on a Mason Jar & set to work.
And these little beauties were born...

{love}

It didn't take me long to find the perfect spot for them in my kitchen.

Total cost for this project: $0

What great finds have you come across this summer?

Linking Up:

**I WAS FEATURED OVER AT THE DIY HOME SWEET HOME PROJECT**
WOOHOO :)


UPDATE: I HAVE HAD A LOT OF PEOPLE ASK ABOUT THE PAINT I USED ON MY JARS. I USED ORDINARY LATEX PAINT (STUFF WE HAD LEFT FROM PAINTING WALLS), POURED IT IN THE JAR & JUST ROLLED IT AROUND UNTIL THEY WERE COMPLETELY COVERED :)

Tuesday, August 16, 2011

Chicken Wire Memo Board

 I have seen so many amazing creations using chicken wire. I think they are just so cute. My husband brought me home an old junk window a while back (sweet man); I thought it would be perfect for this project!

BEFORE
After I put on a coat of Mistint paint.
I am loving this color :)
After sanding & adding stain.
All finished with a 1950's tablecloth & chicken wire attached.
I love how it turned out. I think it will be a cute memo station in my kitchen!!

I AM SO EXCITED!!! I WAS FEATURED OVER AT The Gunny Sack :)

Monday, August 15, 2011

Cheerio Squares Yummy Treat

These Cheerio Squares are amazingly delicious so I thought I would share the recipe.


INGREDIENTS
1/2 CUP WHITE SUGAR
1/2 CUP CORN SYRUP
1/3 CUP BUTTER
1/2 CUP PEANUT BUTTER
2 CUPS CHEERIOS
1 CUP CORN FLAKES
1 CUP PEANUTS (OPTIONAL)

Combine sugar, syrup, and butter in sauce pan & bring to boiling; remove from heat
Add peanut butter
Combine Cheerios, corn flakes & peanuts (optional) in mixing bowl.
Pour boiled mixture over cereals & mix well
Pour into buttered pan; cool & cut into squares

ENJOY :)

Sunday, August 14, 2011

Cute School Chair

I found 3 of the cutest little school chairs at a thrift store that were just dying to come home with me. I really didn't NEED 3 of them, but I couldn't leave them behind ;)  Plus, for $1 each I would be crazy not to buy them all!!


BEFORE

My darling little chair AFTER

I spray painted it black & used my Cricut to create a stencil. Then dry brushed with the white paint.

Such an easy, fun & frugal fix up!!

Friday, August 12, 2011

An Old Window Makeover

I found this old window on one of my many thrift store adventures. I love the way it just has the 3 panes of glass. I had it around for awhile trying to think of something to use it for. I sloppily dry brushed some white paint on it and got out my Cricut. Here is what I came up with.


It's now hanging in my dining room :)


Cheap, Cute & Easy. Just my style!!


Wednesday, August 10, 2011

DIY: WOOD NAME SIGN

I wanted to do a project using my Cricut and I thought this sign would be a good one. I went out to the garage to rummage through all the scrap lumber pieces until I found one that looked like a good size to me. I spray painted it an off white color and let that dry for a little bit. After my board was completely dry I brushed on some gray tinted glaze that I had on hand (bought at a local hardware store). I used a rag to rub the glaze around and wipe some back off. I had to play around with the Cricut a bit to get the right size for my letters. I just used scrapbook paper for it. I applied Mod Podge to the whole thing and let it dry.

I added the year we were married.

Sorry for the picture, no natural light when this was taken.

I think it turned out pretty cute :)


Monday, August 8, 2011

China Hutch-Before & After

We live in a 1938 Bungalow house. When we bought it the carpet, walls, fixtures, etc. were all 70's style. One room at a time, we have tried to bring it into this decade (with a cozy cottage feel). Here is a before shot of our dining room. This is exactly the way it was when we bought it, but somehow WE saw potential!

I had always dreamed of having a dining room and this was IT!! And the china hutch was such a bonus, I loved it :)

A little (okay A LOT) of blood, sweat, and tears later....

The main focus is the major transformation of the china hutch. Going from the dark wood to this bright white has really lightened it up in here.
I painted it myself. I added a light blue color to the inside to give it a nice contrast. I have it filled with my husband's late mother's dishes. I was able to keep the original glass knobs. They are so charming. The sign you see sitting on the floor will be another post :)
Amazing what a little paint can do!!


Tuesday, August 2, 2011

Rosette Necklace Tutorial

    Take 4 nylon loops & slip knot them.
    Tie a knot at one end for the center of your rosette.
    Roll & twist it while hot gluing into rosette

Repeat this process for however many rosettes you would like.
I used 4 loops for small rosettes & 8 loops for the bigger one.
For the necklace part just do the slip knotting until you have the length you like.
Hot glue rosettes to necklace & let dry.
Enjoy!


Linking Up:


Monday, August 1, 2011

DIY: Rosette Necklace

A couple weeks ago I bought my kids a bag of Nylon Weaving Loops from goodwill for $1.99. It was a brand new bag with a $4.99 Hobby Lobby price tag still on it. Score :)

Anways, they were bored today and got them out to create something. A little light bulb went off in my head!! This is what we ended up with.

The girl is pretty excited to add this piece to her jewelry collection!
Had to make a matching ring while we were at it.

I think she will be pretty stylin for a 12 year old. What do you think?!?

Check back tomorrow for the EASY PEASY tutorial :)

Linkin Up: